
|
|
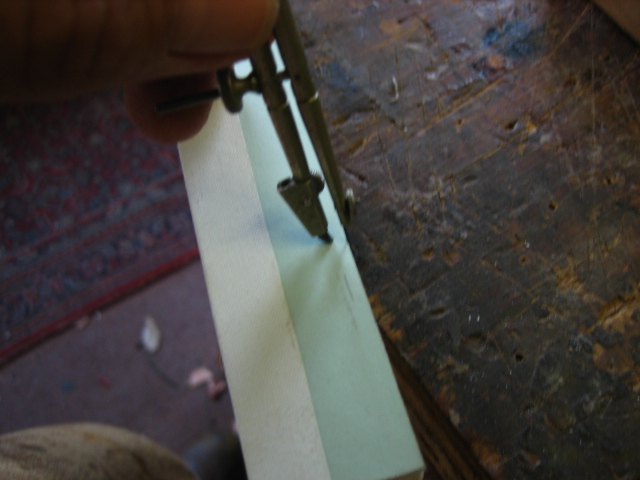
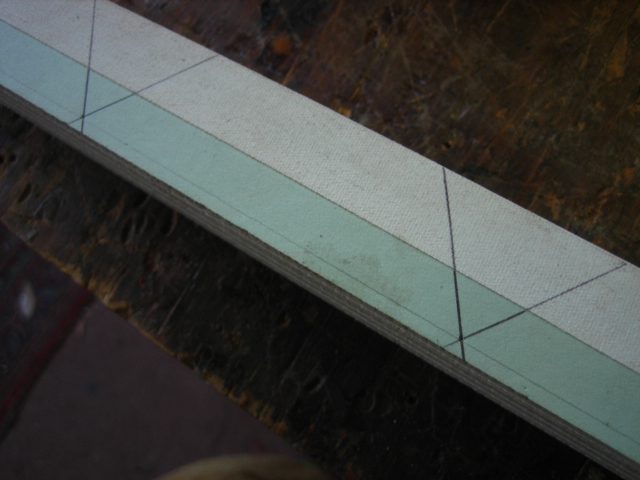
| Mark a line
the width of the rabbet, are you with me? |
Walk off the
six side......or eight.....or whatever. You will get the EXACT
fit. (unless you are not paying attention) |
|
|
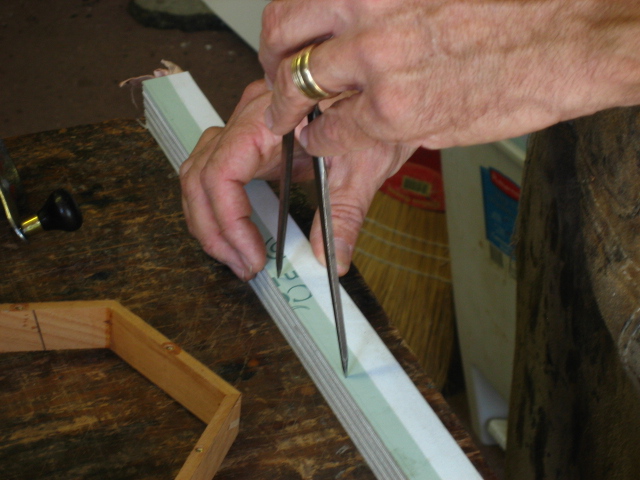
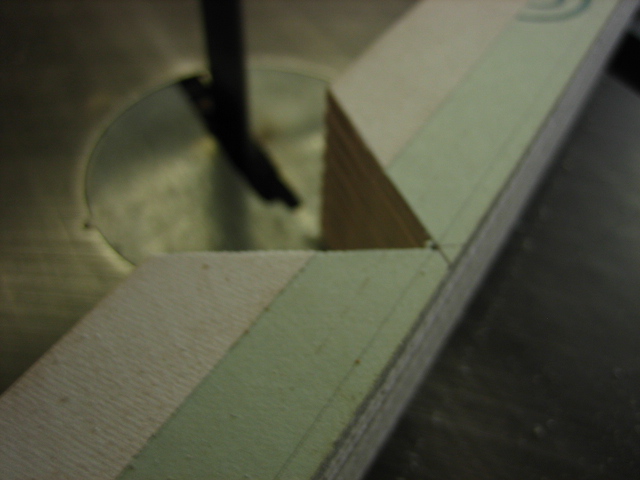
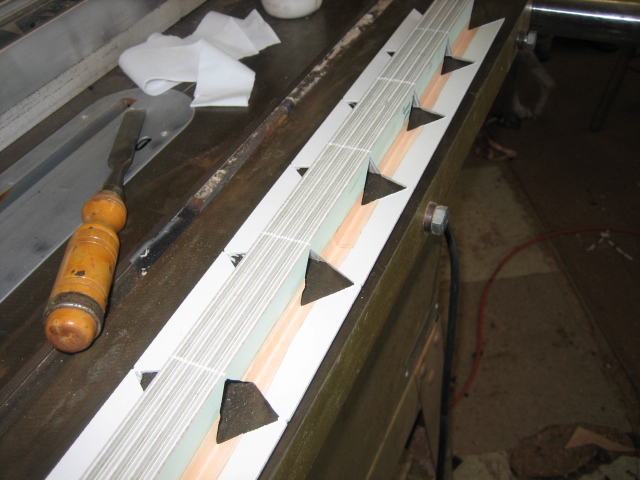
| Aha! |
a 55 degree
angle works for a six sided concertina...... |
|
|
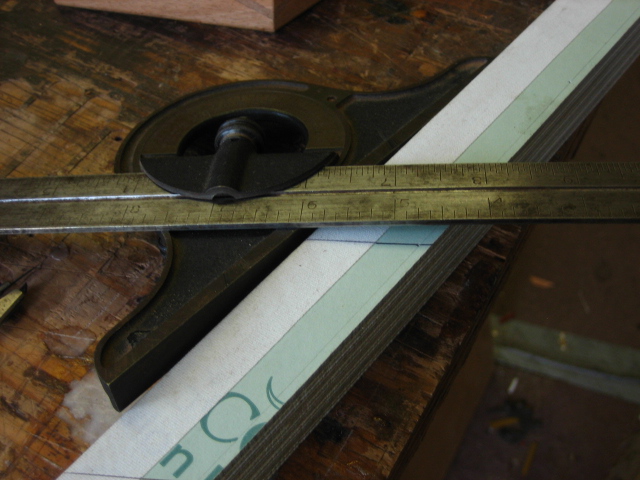
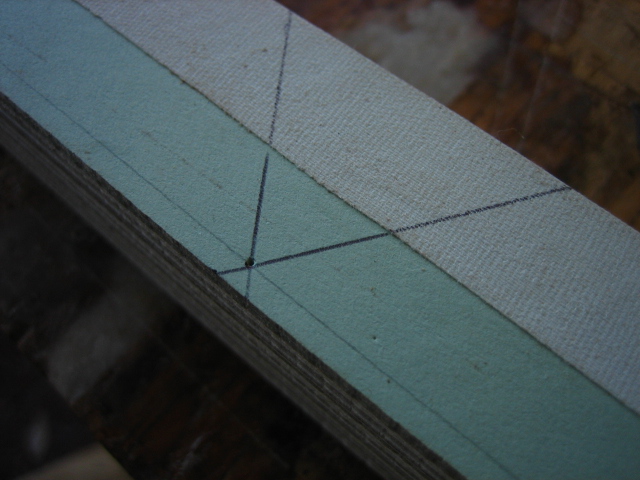
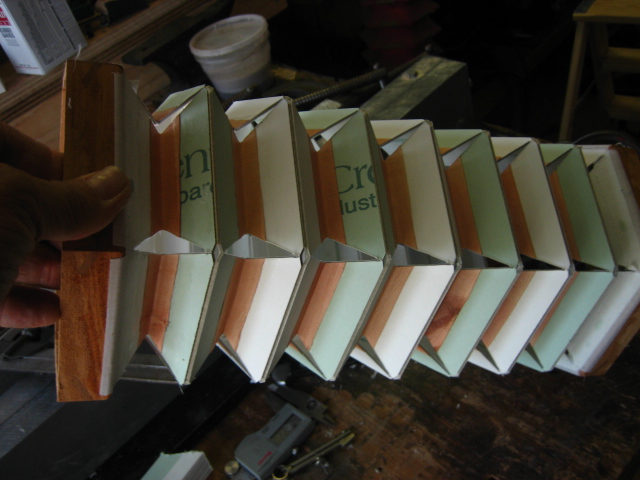
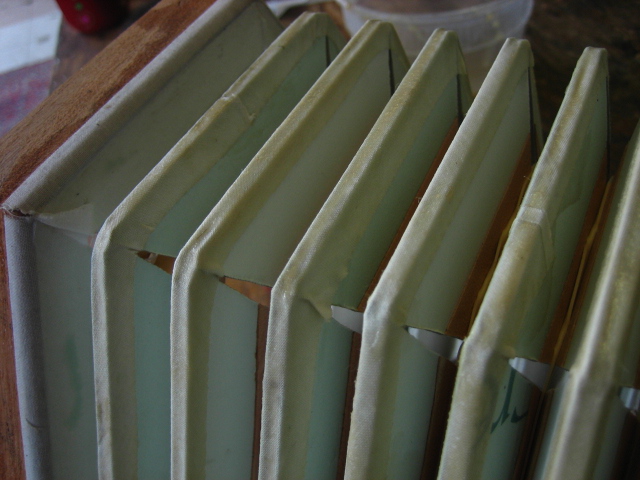
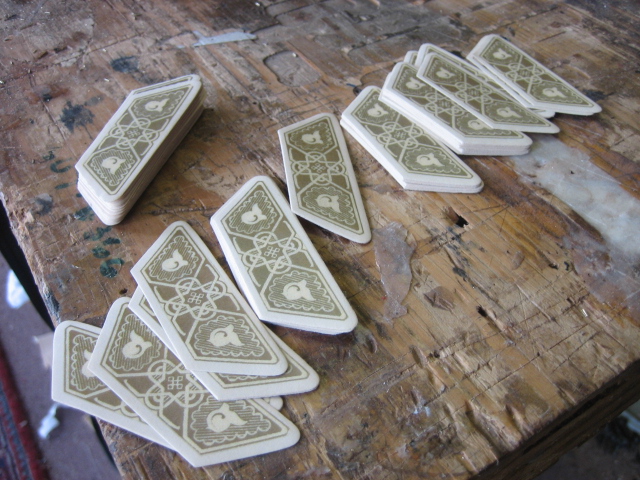
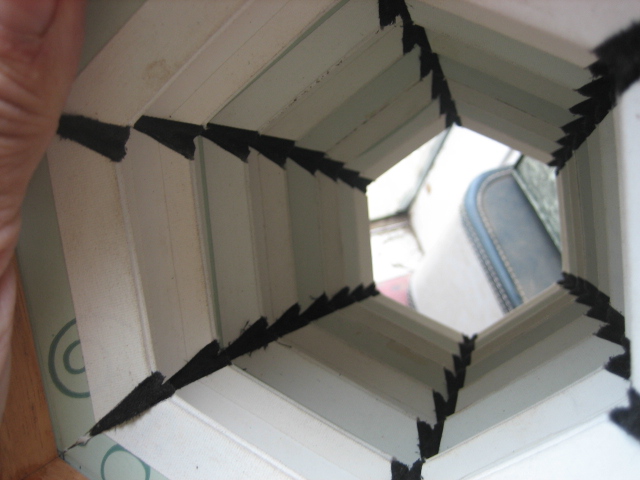
| hmm, now I
get it.... |
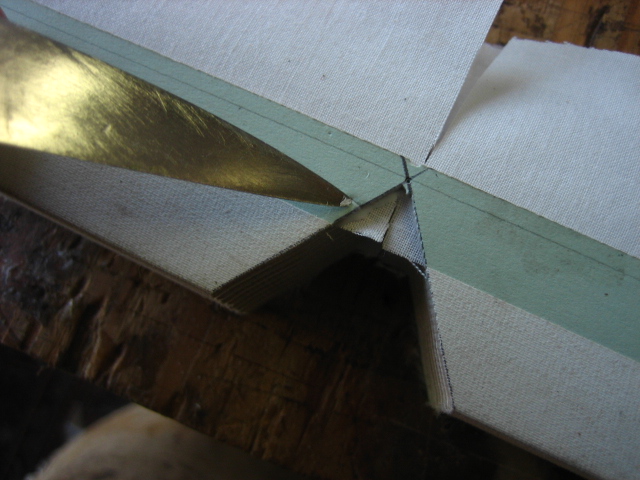
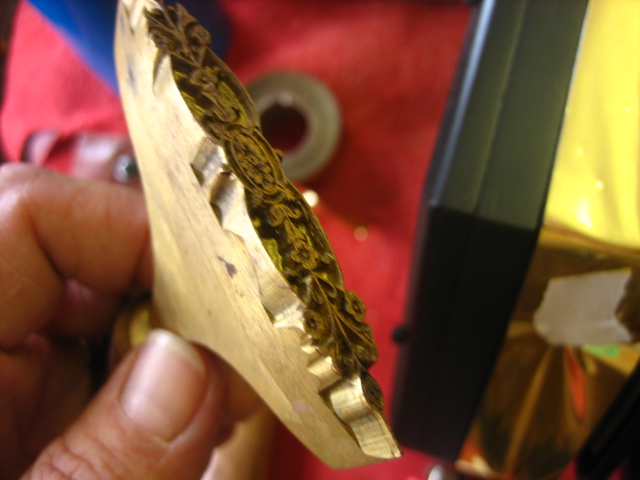
Do you
recognize the trapezoid in this picture? |
|
|
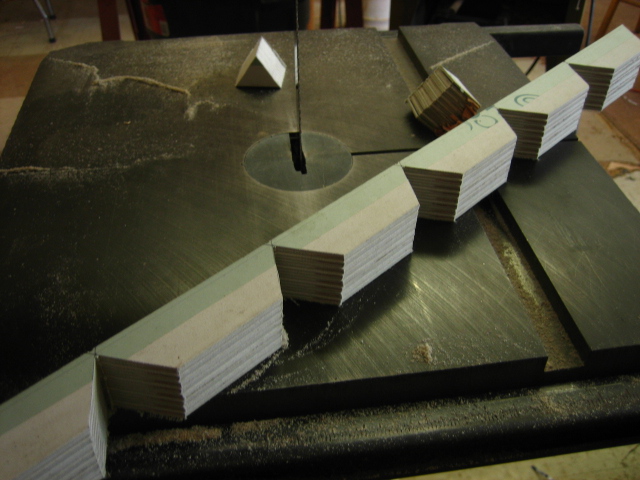
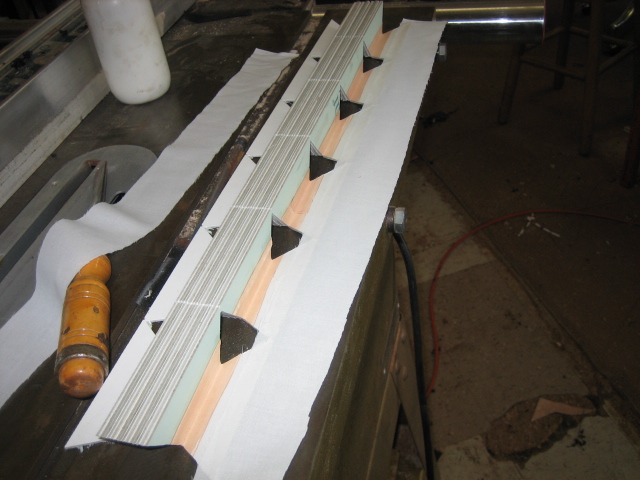
| Split that pencil line with your
bandsaw....no excuses for a bad bit. |
|
|
|
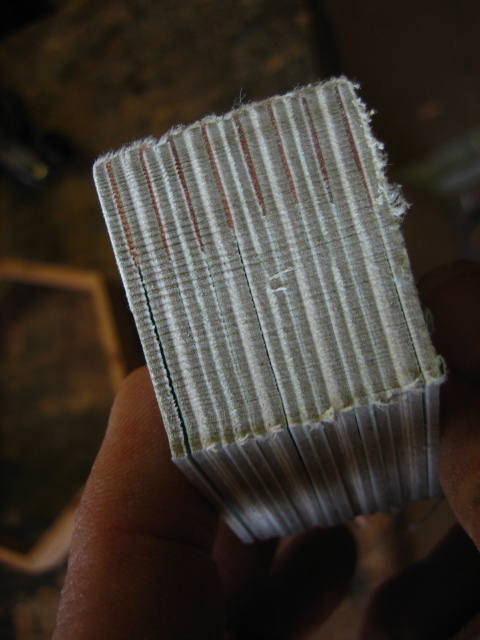
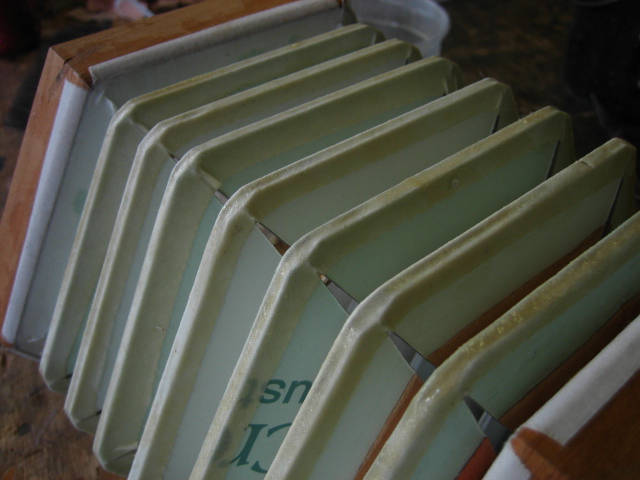
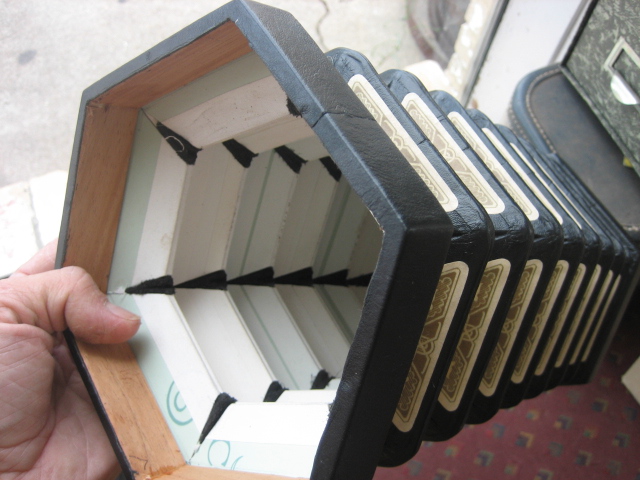
| Cut just shy of the
edges......you will need that little piece of matboard for a while. |
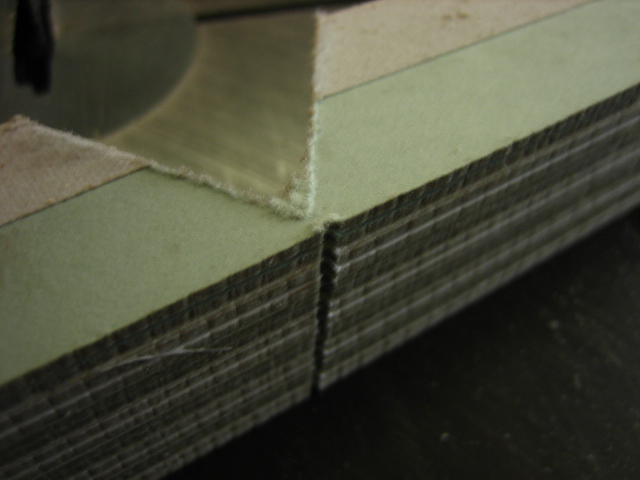
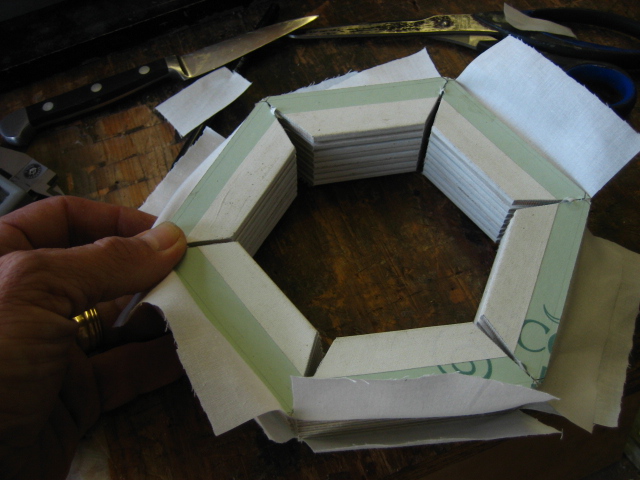
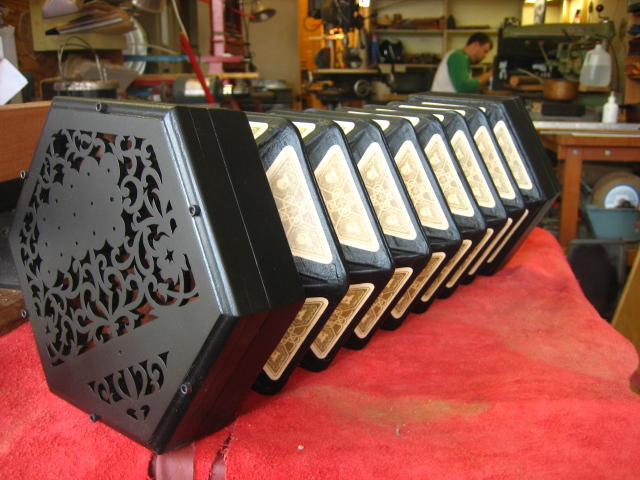
Note how completely flat this
closes.....without effort at all and flat as a pancake. (flatter!) |
 |
 |
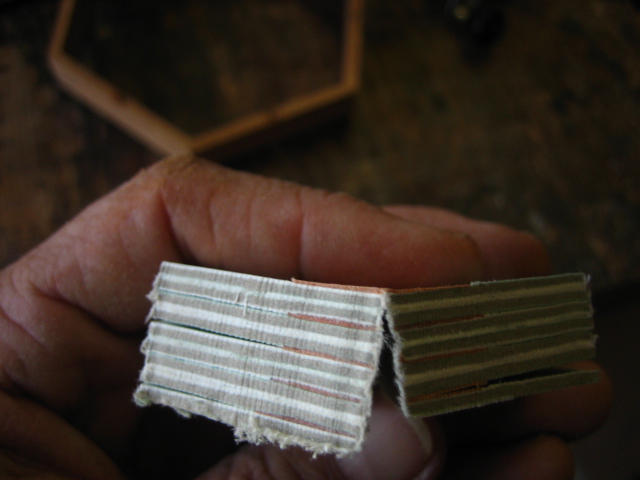
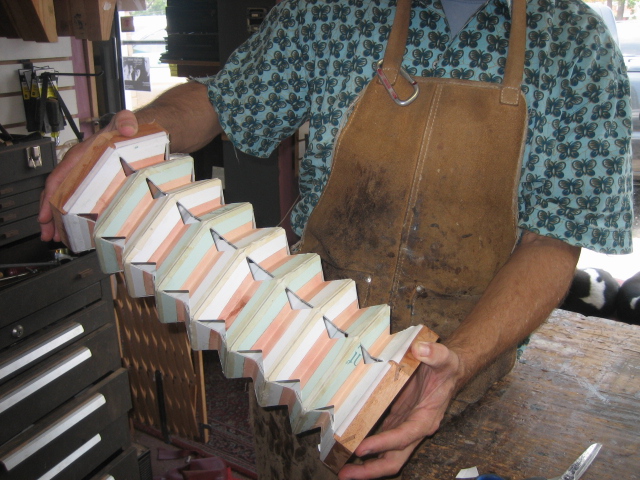
| Yet, with
ease opens 180 degrees |
|
 |
 |
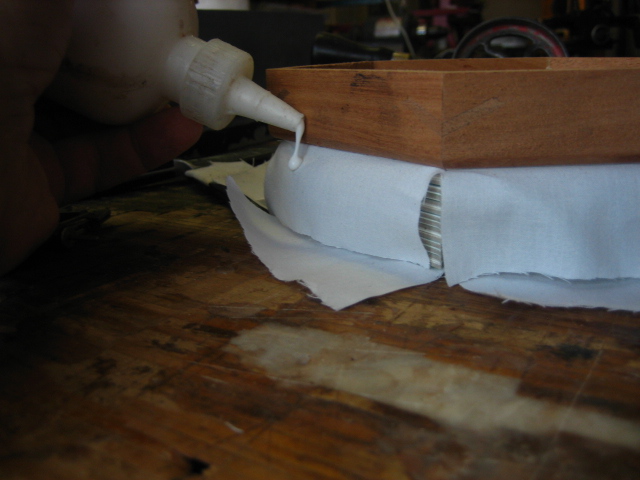
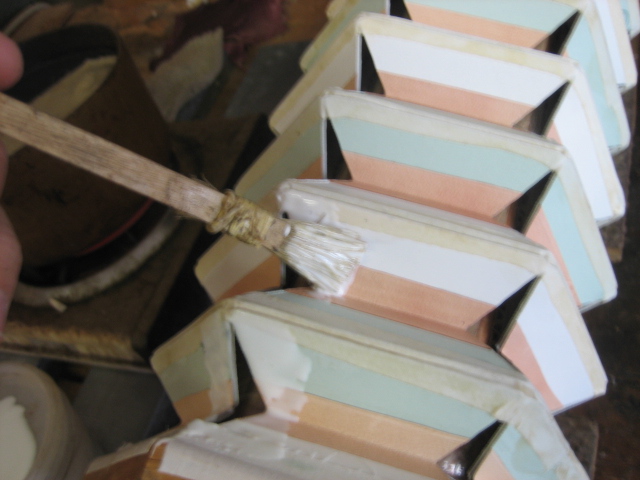
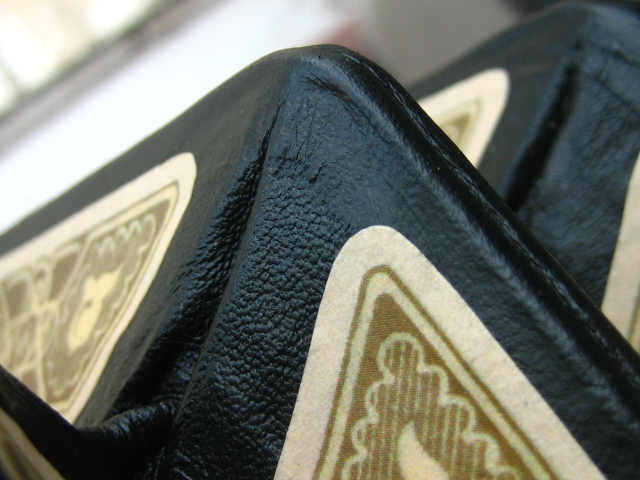
| Glue linen
to the edge of the bellows |
Very pretty
I think. |
 |
Let me stop right now and tell you where I figured this out. Several years ago........................ I was pretending to listen to the sermon while seated comfortably at church. Spiritually, I was many miles away in my shop. Admit it, you have done this too. It there occured to me this basic idea might work. It did, sort of. After many attempts and refinements I had a functional bellows. It took a couple years to hammer out the little details, glues, clamps moisture content, rabbet joints. I did most of that pretending to listen to the sermon as well. Now, I did confess this to my preacher and thank him mightily for the inspiration and the comfortable seat in the sanctuary. He said that perhaps it was some kind of divine inspiration, I like to think so. thank you Robert Montgomery! |
 |
 |
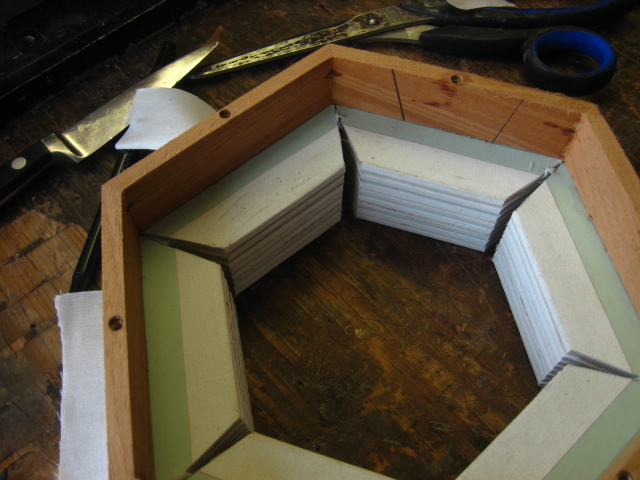
| A good fit,
indeed! |
Securely
glued now |
 |
 |
 |
 |
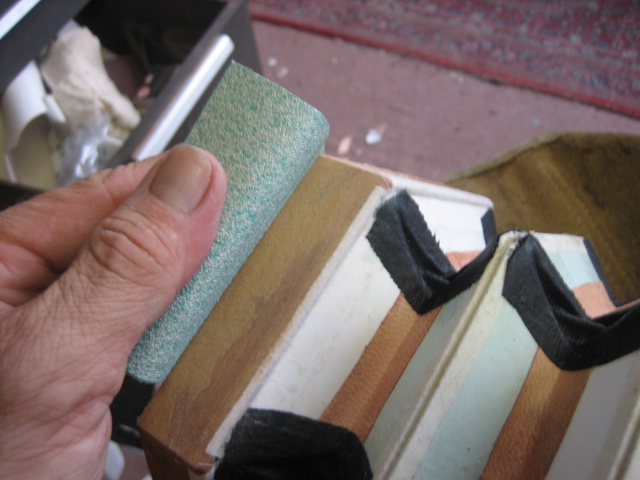
| Trim the
corners as close as you wish, but I would leave just a hair there. |
This is
always a satisfying moment.......unless I did a sloppy job. |
 |
 |
 |
 |
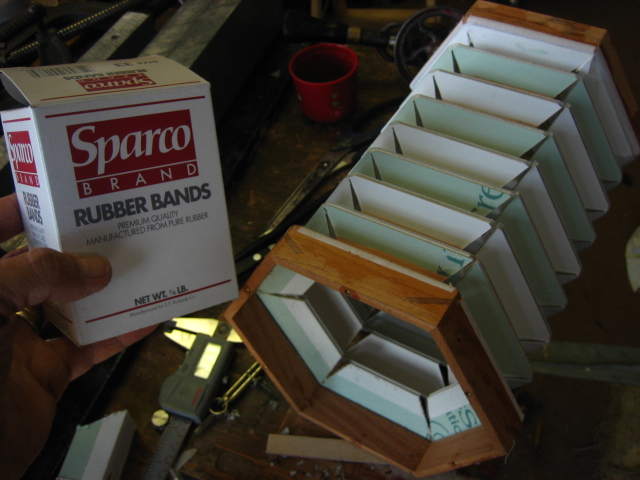
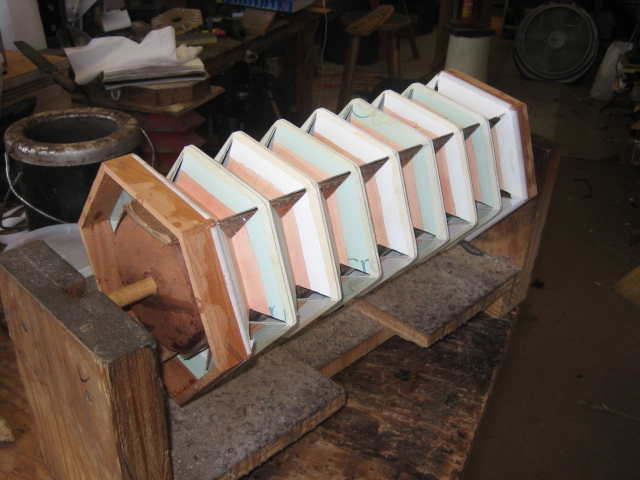
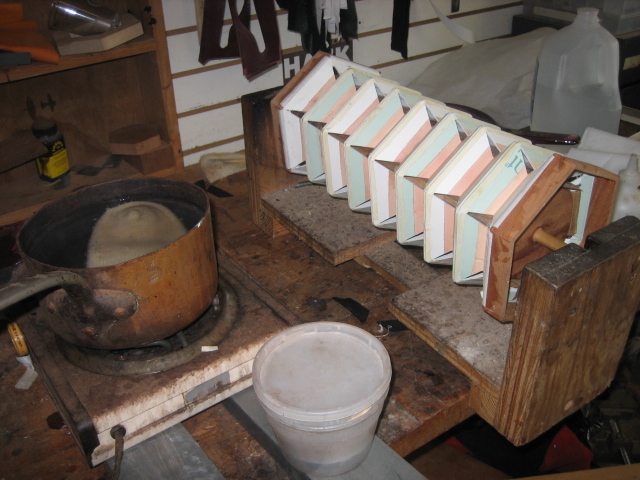
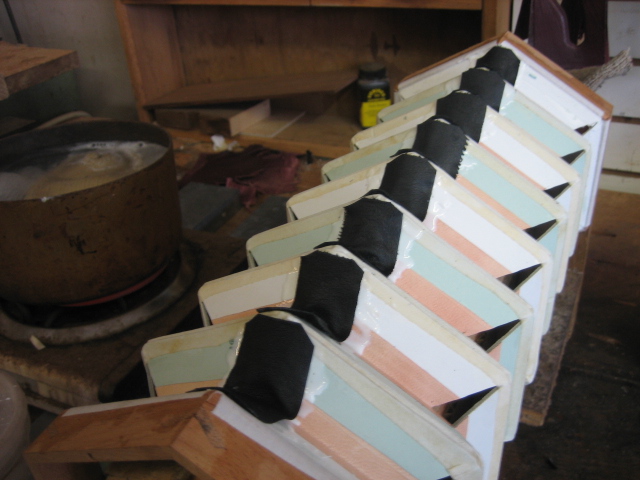
| Rubber bands
help keep the free ends together for the next operation |
Rubber
band in place in the valley |
 |
 |
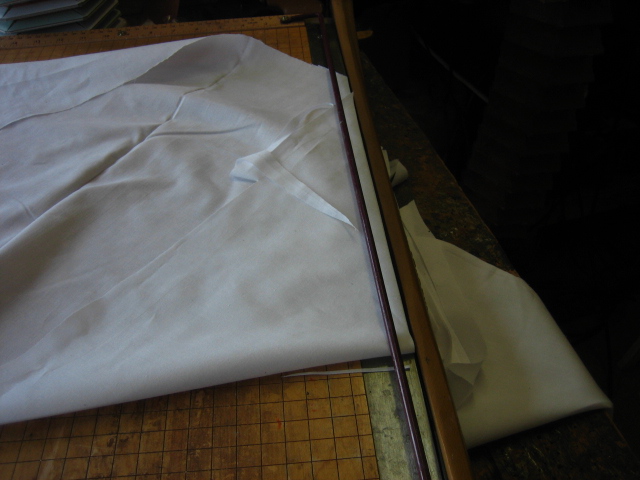
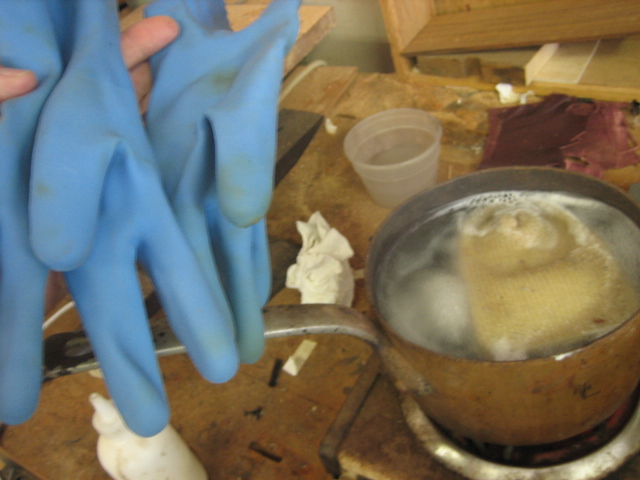
| 100 % cotton
cut on the bias into 5/8" strips |
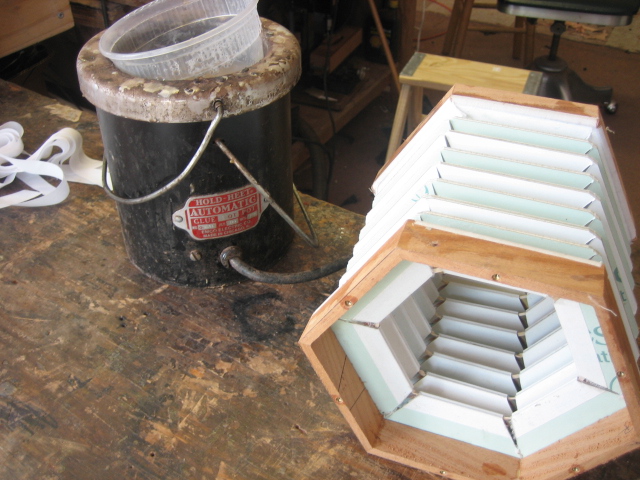
Time to get out the hide
glue pot, plug it in and make a fresh batch of hide glue. I have
often kept my coffee warm in the same pot. |
 |
 |
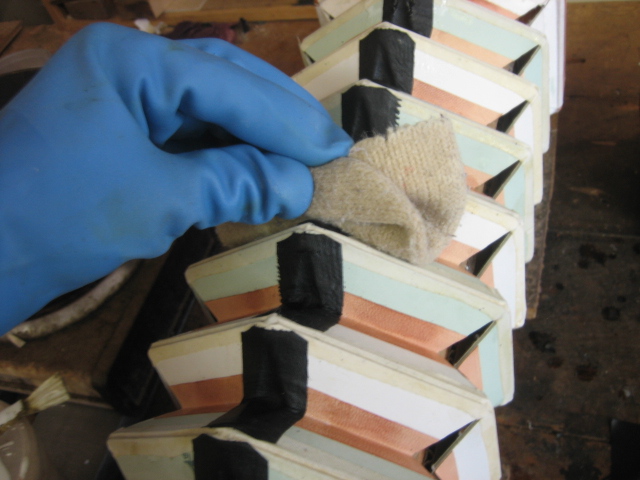
| With tweezers, soak the cotton
or lined strips in hide glue and use the tweezers to "squeegy" off most
of the sticky viscous stuff......work briskly er the hide glue get too
cold. |
The strips of hide glue soaked
lined goes around the exposed edges of the bellows cards. This
makes a very strong but flexible joint. The hide glue shrinks a
bit when dry and conforms nicely to the bellows cards. This also
makes a tough and durable foundation for the leather to be applied
later. One can put additional glue over hide glue with great
success, not all glues will bond to a previously glued surface. (does
that make sense? I am not editing this page as you can no doubt
tell) |
 |
 |
| cutting the linen on the bias
helps make a smooth corner |
When the linen is darn near
dry....open the bellows to their natural extent. We want to
exercise the hide glue joint. If you let it dry, the linen will
rip. |
 |
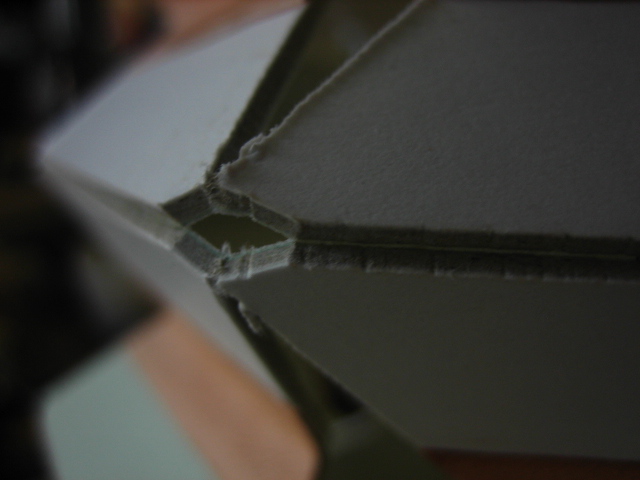
Ok, let me explain an important
point here. Bellows are made up of two "planes", one plane bisects the outside edge, the other plane bisects the inside plane at the valley. The two planes are connected via the lines formed by the edges of the trapeziods. The outside plane is of a fixed dimension, the inside plane has a variable dimension. A properly made bellows will stop dead at the limit of extension. If all the trapezoids are cut the same and all the glue joints are in the same relative position, you can feel the bellows come to its limit very clearly. This is a geometric fact (is that a term?) If one had a bellows made of metal and hinged at the bellows card joints, it will extend to the same dimensions. That does not mean you cannot defeat this by bending over over extending the cards. Don't do that, you will destroy the inherent stability of the structure. (the old sport of "drawing and quartering" comes to mind here....that activity will disrupt the integrity of the human body) It is easy to feel this when the bellows in their "endoskeletal" phase....much harder to perceive when the bellows are covered with leather.....or are poorly aligned when they are glued up. SO.....I make an assembly jig that has the outside diameter that matches the extended diameter of the inner plane. (So I have a bunch of these jigs made up for each different size concertina.....I never said my method was slick or easy now did I?) The leather work has to be completed with the bellows in their extended position. |
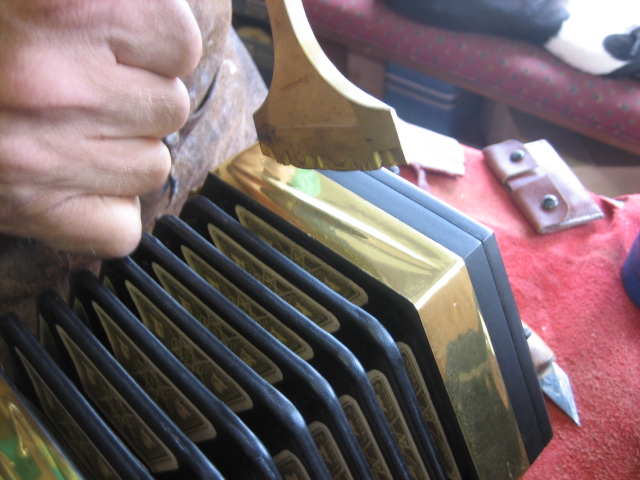
| Come on, you knew there had to
be a jig involved here somewhere, didn't you? |
|
 |
 |
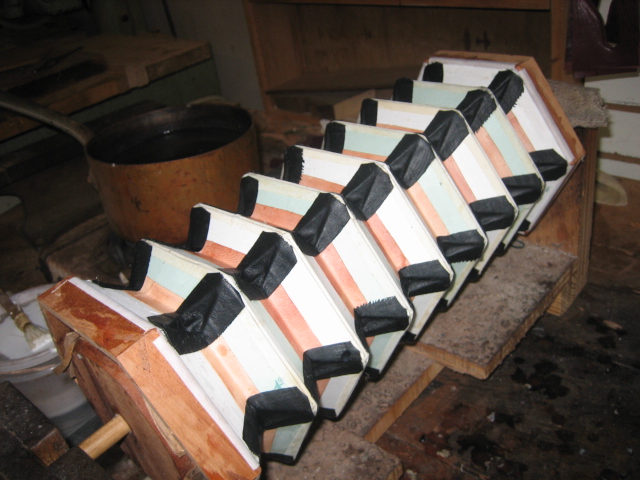
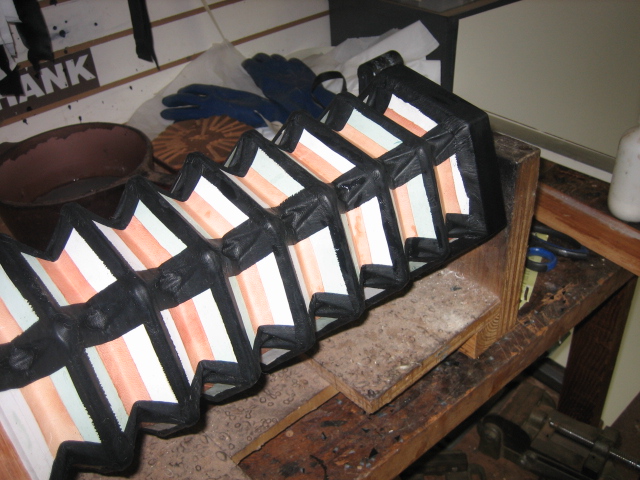
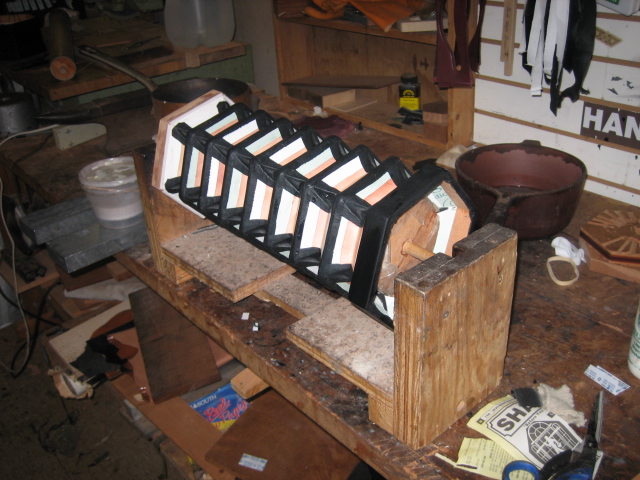
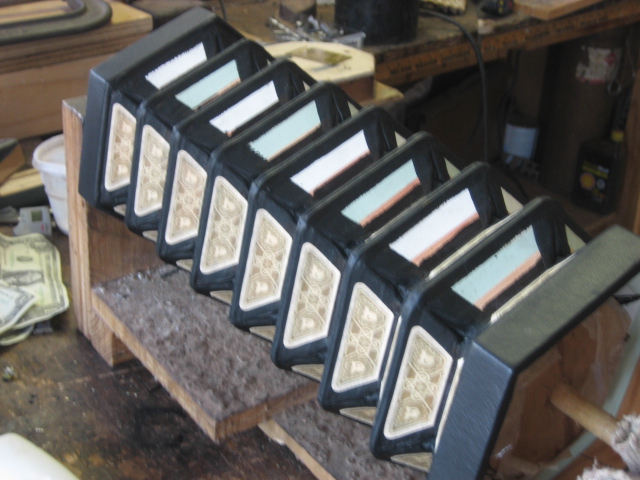
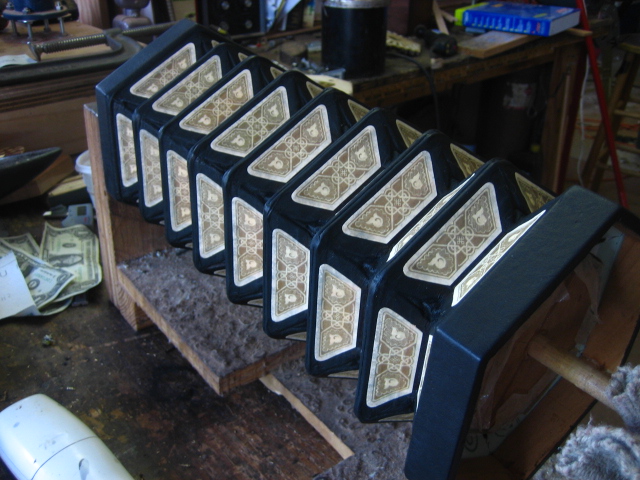
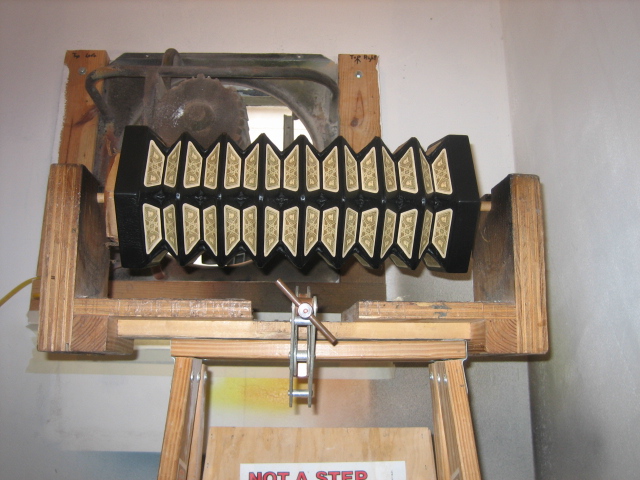
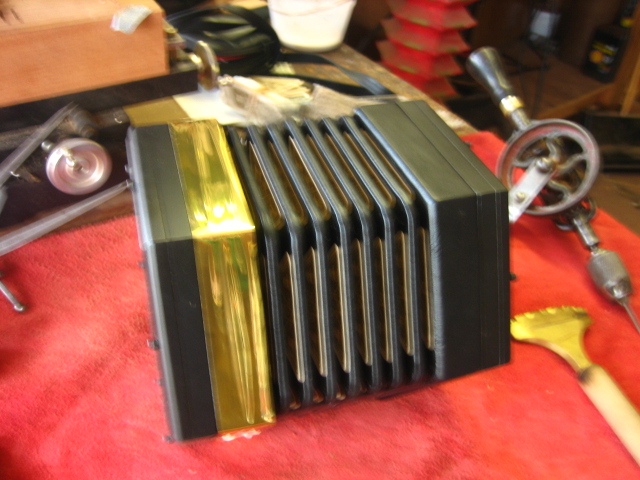
| Bellows shown here mounted on
the assembly jig. I wish you could feel the absolutely sturdy
nature of this assembly at this point. |
LEATHER
WORK |
 |
 |
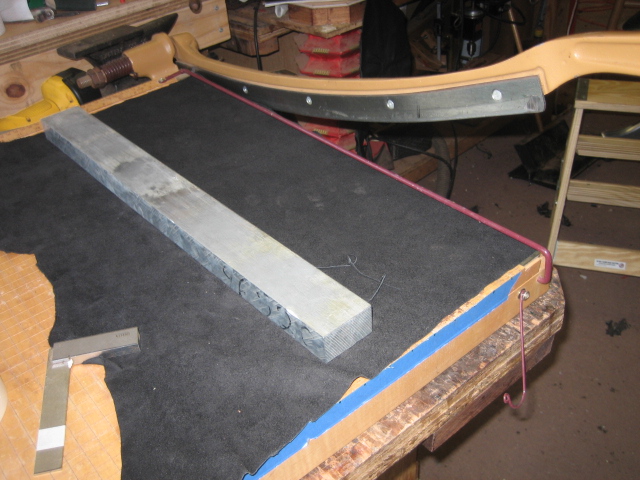
| I use a chrome tanned
leather....about .025" thick. I have used thicker and thinner, I
have used vegetable tanned goat, sheepskin, kangaroo, calfskin all with
good results. |
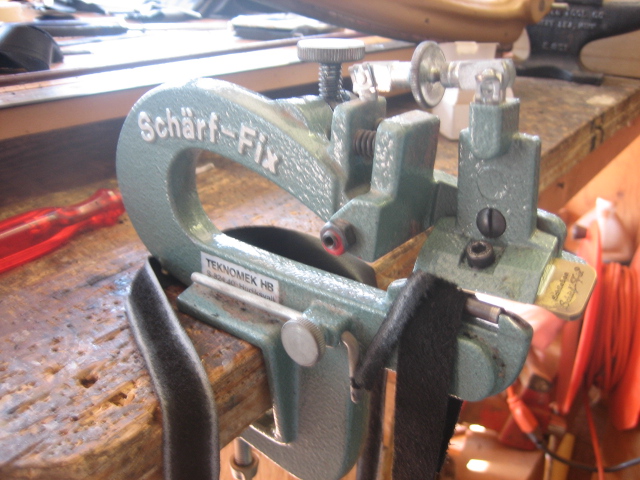
Paring and skiving is done with
a Scharft-fix.......I do love this gadget. Skiving by hand is
very time consuming and usually not too accurate. I need to cut
the gussets, edge runs and endruns. |
 |
 |
| Time for a pot of BOILING HOT
water, rubber gloves, more glue and an old wool blend sock. |
Glue applied to the gusset
region.....don't be stingy with it either, ok? ON THE
SUBJECT OF HIDE GLUE
9/15/07 I have lately been using hide glue for most all of the bellows gluing. Hide glue has a character that makes it particlularly useful for bellows making. Properly used and applied, hide glue provides a much more flexible joint than a PVA glue. This is because hide glue dries hard and will fracture into hundreds of tiny glue crystals each tenaciously holding fast upon flexing, while a PVA glue remains ever tough and stiff. A bellows with hide glue joints will require less "break in" and will be more flexible than bellows make with other glues. |
 |
 |
| Gussets all laid out on the
valleys |
I am very serious about the
rubber gloves and boiling water. That was a nice sock at one time. |
 |
 |
| Press the gussets in place with
a hot wool sock. Wool blend will hold its shape, stays warm, will
let you press into the gussets and will not wad up like a wet paper
towel, Cotton does not work well at all. |
Gusset glued
in |
 |
 |
| keep the leather down in the
valley of sheepskin skiver. The bottom of a chrome tanned leather
glues up very nicely to the top of the skiver. |
This
is a hot job in the summer, I'll tell you. |
 |
 |
| Lets clean up the wood before we
glue the leather down. |
edge runs and end run glued
on. Not too many picture here....too much glue on my hands to
touch the camera. I hope you get the idea.
Incidently, it take a bit of practice to apply the proper amount of
glue to these strips. I use the hot sock on all these
pieces. |
 |
|
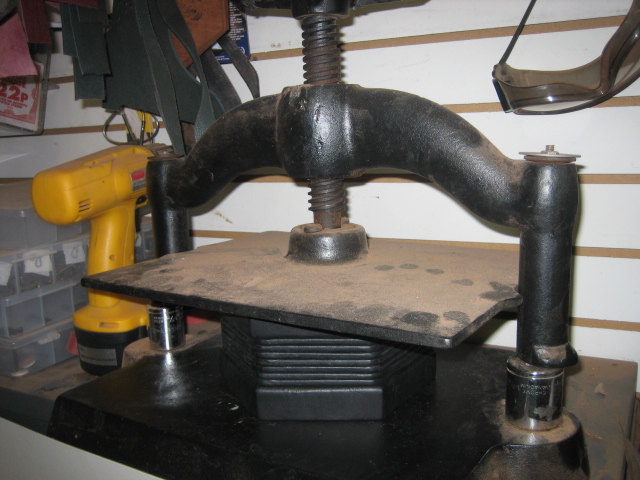
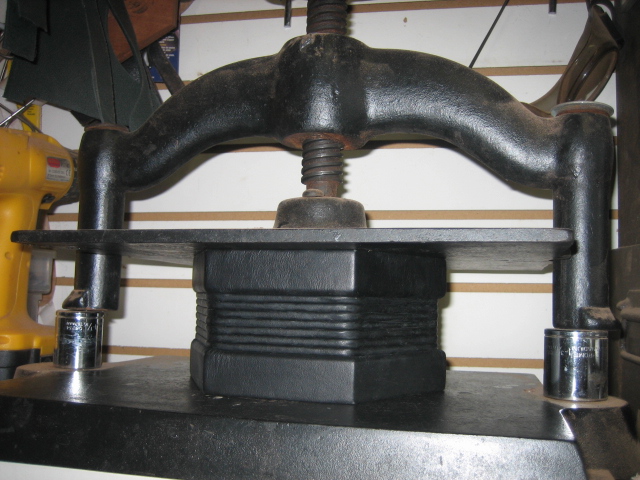
| This is a nipping press, a
bookbinders tool. It works great for this purpose. If you
don't drill a smallhole in the bottom of the lower platen.....you will
be very very sorry. If you can't figure out why.........ask me. |
 |
 |
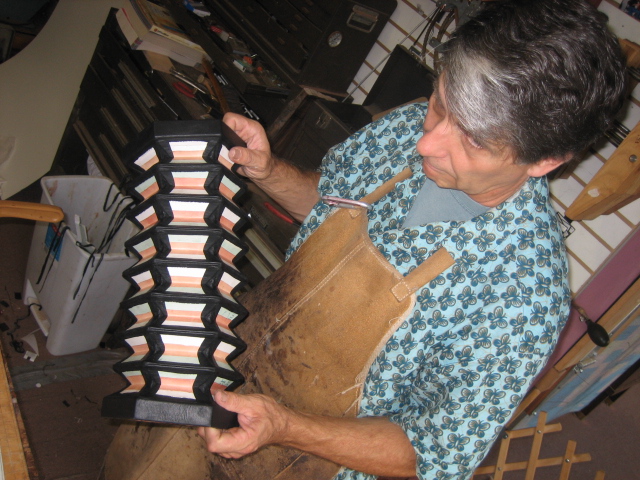 |
| Another shot. I just like the looks of this. | a man and his bellows. |
 |
 |
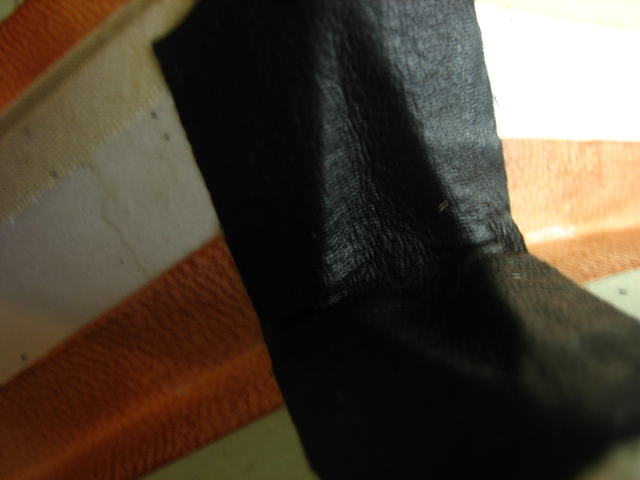
| Dye the valley black |
I make these myself, one day I
will show how. |
 |
 |
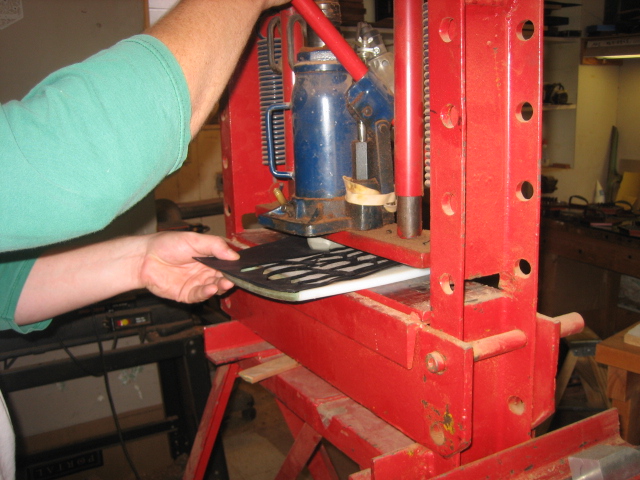
| a homemade hydraulic press and
cutting die for the papers. |
I glue the papers on with a
dilute solution of PVA and water. The papers are of 20lb weight
stock |
 |
 |
| looks nice so far. |
into the lacquer room for a
light shot of a satin lacquer that is my very exensive explosion
proof exhaust fan you see in the background. |
 |
 |
 |
 |
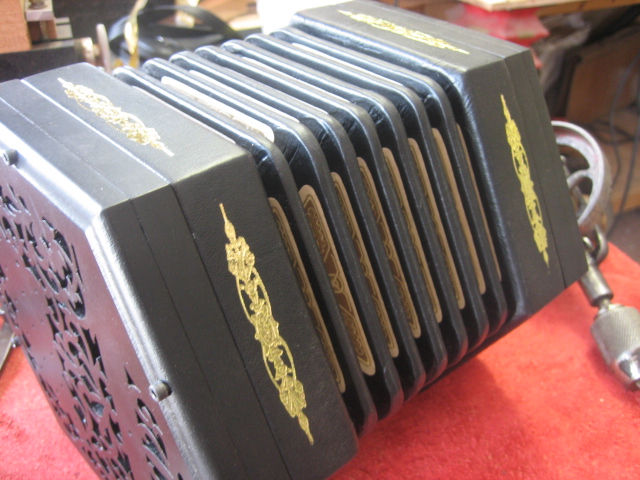
| a view into the gaping maw of a Tedrow Bellows | |
 |
 |
| I had this tool made for me in
England. |
|
 |
 |
Bob Tedrow Tedrow Concertinas Homewood Music 205 879-4868 |
Day 9 |