A procedure for correcting warped, broken, bent, stripped concertina endscrews

Homewood Musical Instrument Company Birmingham, Alabama  http://hmi.homewood.net


Endplate screws on antique concertinas can frequently fail. This often results in  air leaks that contribute to poor performance in the instrument.  End screws are usually steel and should last the life of the instrument, but years of abuse by well meaning players with bad screwdrivers and overzealous tightening can ruin screw heads, strip the small brass endbolts hiding beneath the chamois lining on the bellows frame or break the screw off inside the concertina.


In the following article, I will describe the method I use to repair endbolts; replace screw heads and to build new screws for concertinas
mvc-020s.jpg (26573 bytes) Our beautiful volunteer, an early Lachenal "new model" with bowing valves, steel reeds; raised ends.....and stripped endbolts
mvc-002s.jpg (37222 bytes) mvc-004s.jpg (26926 bytes)
After disassembly and inspection, I noted three stripped endbolts and four unsuitable endscrews.  Using a very sharp blade to cut the chamois and expose the endbolts and endbolt anchor screws
mvc-017s.jpg (31868 bytes) mvc-005s.jpg (24690 bytes)
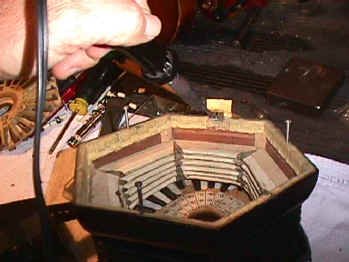
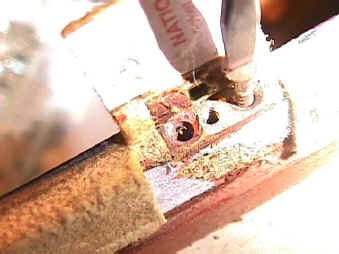
The steel endbolt anchor screws are driven through the endbolt and into the wood of the bellows frame.  They are steel and are usually a little rusty.  It is very important to use the correct size screw driver here to prevent doing harm to the screw head.  If a modest turn of the screw driver 
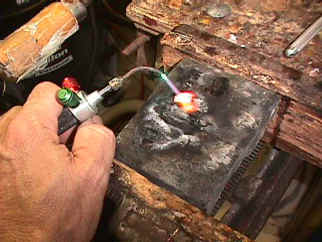
fails to move the screw, I use a hot soldering iron to heat the screw for about a minute.   This punishment will usually loosen the screw enough for you to gently twist back and forth to  slowly remove a rusty screw. 
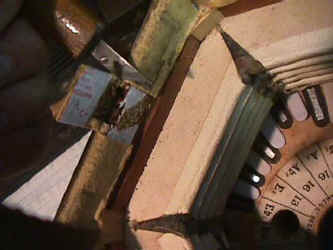
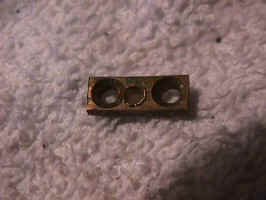
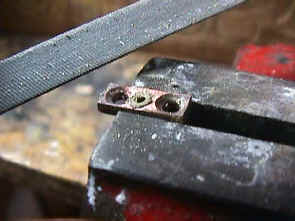
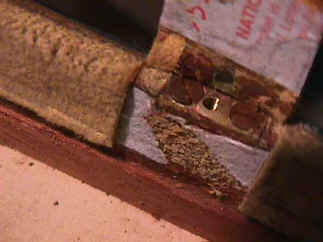
The offending endbolt. note the center hole, stripped of its threads, a barren excuse.  Note also that the center hole is a little off center.  This is usually the case,  therefore, I must be careful to replace 
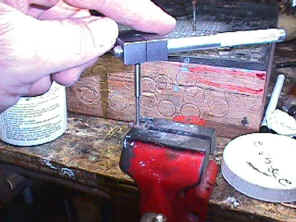
the endbolt back in its same position. I usually make a small mark on the forward edge.

This brings up another little problem.  I cannot just tap new 
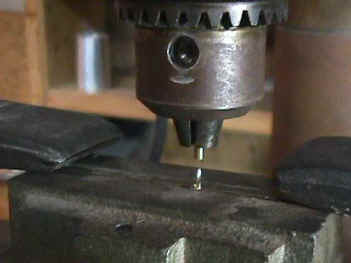
threads into this piece, for the screw would then have to be a corresponding larger size and would no longer fit in the existing holes in the ends of the concertina.  I   
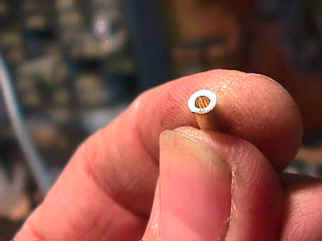
will have to bush the center hole to bring it back to its original small size and then tap the threads into the  center hole.

mvc-007s.jpg (21072 bytes) mvc-008s.jpg (18587 bytes)
I prepare a bushing of brass by chucking up my stock in a drill press and bringing the stock down onto a drill bit secured in a vise.   Set up this way, the stock automatically centers onto the drill bit and cuts a perfectly centered hole. I want this bushing dead center of the original hole so that my screw falls down through the concertina endplate directly into the hole in the endbolt.  There is no room whatsoever for error here because all six  screws and bolts must line up perfectly. 
mvc-009s.jpg (43527 bytes) mvc-021s.jpg (42180 bytes)
after cleaning up the original, stripped hole, I place the newly made bushing into the center hole; apply flux and silver solder the bushing into the hole.  Silver soldering, hard soldering, brazing all refer to a high temperature soldering procedure that will require an oxygen/acetylene gas and a jewelers hand torch. Soft or lead/tin solder is not hard enough to handle the stress of tapping and will not hold the bushing in place

After silver soldering, I cut the excess bushing material away with a Jeweler's saw and file the endbolt flush. Nice and neat.

mvc-010s.jpg (28572 bytes)
mvc-011s.jpg (39319 bytes) mvc-012s.jpg (37516 bytes)
Tapping the new threads.  As we all know, the taps and dies for concertinas exist only in England.  I used a 2-56 tap and die for this job since I am building new screws as well.  One day I will own the proper taps and dies for both Wheatstone and Lachenal instruments.  You probably won't and will have to do it this way yourself. Cutting threads on a piece of screw rod material to match the new threads in the endbolt.  I take the length from the old screws and will use the old screw heads if they look nice enough.

mvc-018s.jpg (25402 bytes)

mvc-014s.jpg (30433 bytes)
soldering the old screw head onto the new screw. reinstalling the endbolt with its new threads.   The next step will be to put glue on the leather and replace the flap.
mvc-016s.jpg (26408 bytes) mvc-006s.jpg (20847 bytes)
Ready to glue.  Note the white paper installed at some point in the past to secure the reed pan. A bowing valve, there is another on the opposite side.
The completed concertina.  Air tight, Ship shape, Bristol Fashion.


For questions about repairs to your concertinas or to be apprised when instruments become available  for sale from my shop, Homewood Musical,  email me at hmi@scott.net

Bob Tedrow

Homewood Music; 3027 Central Ave Birmingham, Alabama 35209                205- 879-4868


mvc-019s.jpg (33960 bytes)